Decopatching Photo Tutorial
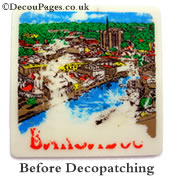
Decopatching, which is sometimes referred to as Deco Mache, is quick and simple. In this step by step photo guide to decopatching you'll see how I transformed a scruffy old coaster into a lovely looking home accessory.
This is an ideal beginners project as it is a plain, flat shape.
You'll need an old coaster, Decopatch glue-varnish, a small blunt ended paintbrush, enough Decopatch paper to cover the coaster plus half as much again (this is a generous estimate.) Click here to buy your essential Decopatch supplies.
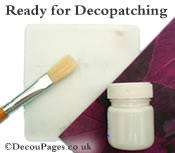
Depending on how bad the surface of the coaster is you may need a paint scraper and white gesso primer. If your coaster is dark coloured you may want to prime it with white acrylic gesso primer to show the paper colours off to their best advantage.
- I scraped the flaking paint off the coaster with a paint scraper & then gave it a scrub with a washing up sponge.
- The surface of the coaster was sound and fairly evenly white, so I didn't need to prime it with acrylic white gesso.
- Roll up your sleeves & cover your work area before you start. If you are the messy type you might want to wear rough clothes or an apron, but once you get the hang of it you can work without getting sticky fingers.
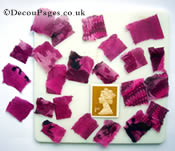
- Having chosen the paper I tore it into pieces a bit smaller than the size of a stamp. This is easier to do if you tear the paper into strips first.
- You can go for uniform squares or rectangles with fairly straight edges or try a more organic approach and have varied shapes and sizes. I kept the pieces that had a nice straight edge to one side and used them for the edges of the coaster.
 I started at a corner so I could work my way round and always have a dry bit to hold. The Decopatch glossy glue dries quite quickly, but you don't want it full of finger prints.
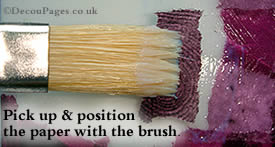
- Brush glossy glue on an area slightly larger than the piece of paper. Put the paper in place and brush over the top with more glossy glue, brushing away any excess. You'll quickly learn to pick up and position the decopatch paper with the paint brush.
-
 Repeat the process overlapping the pieces slightly.
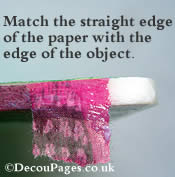
 - For the edges there are 2 approaches: You can leave the paper overhanging the edge until dry and then trim with scissors. Alternatively, as shown in the photo, carefully position small straight edged pieces of decopatch paper. Brush the glue-varnish inwards from the edge towards the centre. Use very small pieces at the corners to minimise creases.
- Continue working until you have covered the entire piece. If you need to stop part way through wash your brush out and wrap in paper towel to dry it out.
-
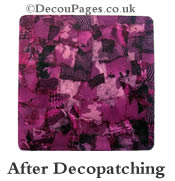 When dry you can coat with Aquapro varnish if you want a more resilient, water resistant finish. It also helps eliminate the slightly tacky feel you sometimes get, especially with non-porous surfaces.
It really is that simple. You can buy a wide variety of complete decopatch kits online. Alternatively, if you have something around the house you want to decopatch then you can buy sample kits that have a colour themed selection of decopatch paper, glue-varnish and a brush.